The Marquee Tool is one of the essential selection tools. It is also most of the times, the most useful tool in Photoshop. It is used for drawing selections based upon geometric shapes. When you use the marquee tool, you’ll only see two options: Elliptical and Rectangular selections. However, there are ways to use this tool for creating other shapes such as squares and circles as well as more complex structures. The process of using the Marquee tool in Photoshop is fundamental; you need to click and pull the mouse. One way of changing the forms on the shape of the marquee tool is by tweaking the shape value in the options palette.
It is essential to understand that Photoshop has a certain method by which it identifies the different elements imported in it. Photoshop is essentially a pixel-based software that only distinguishes a pixel from another based on colours. It doesn’t automatically detect a shape or form.
Photoshop’s Marquee tool can be used for multiple purposes and comes in very handy, especially if you’re a designer. Here, we will provide you with a detailed tutorial for mastering the Marquee Tool in Photoshop, step by step.
The Rectangular Marquee Tool:
 The Marquee Tool is situated in the first place in Tools panel if you have double column and second place if you have a single column tools panel. The icon of this tool looks like an outline of a square. Start by selecting this tool. Use the rectangular marquee tool by pressing the mouse at the point where you want to initiate the selection.
The Up Left to low right approach:
Generally, you should always start a selection from the up left end of the object/area you want to select. Now, hold your mouse button, and pull down to the low right corner. Release the mouse, when you’re satisfied with the selection. Your selection is now complete.
1. Rectangular Selection
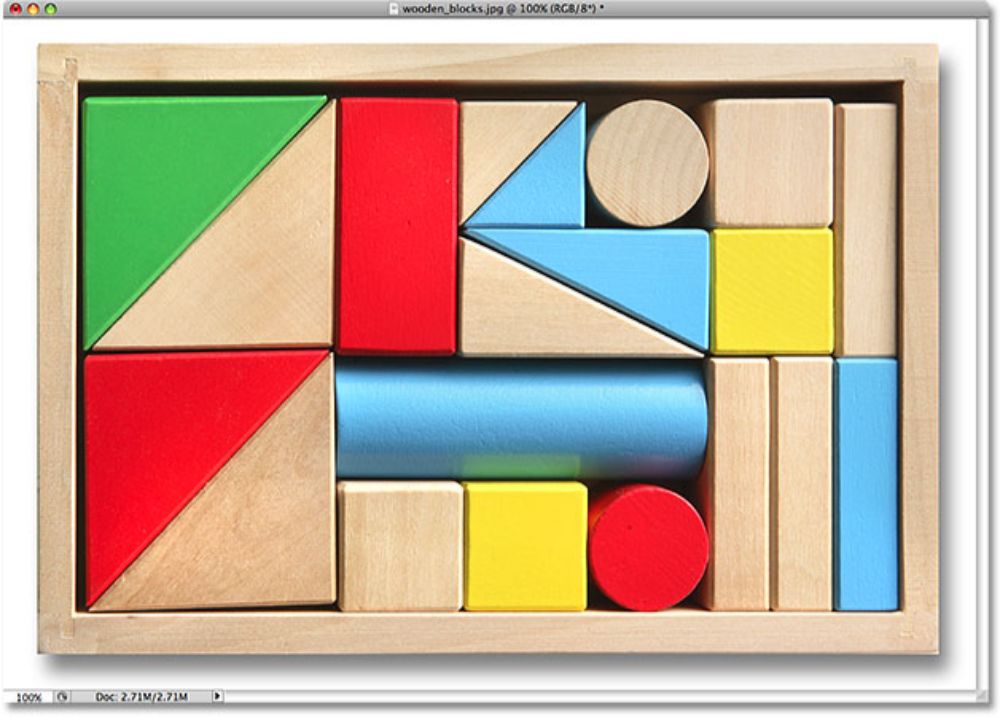
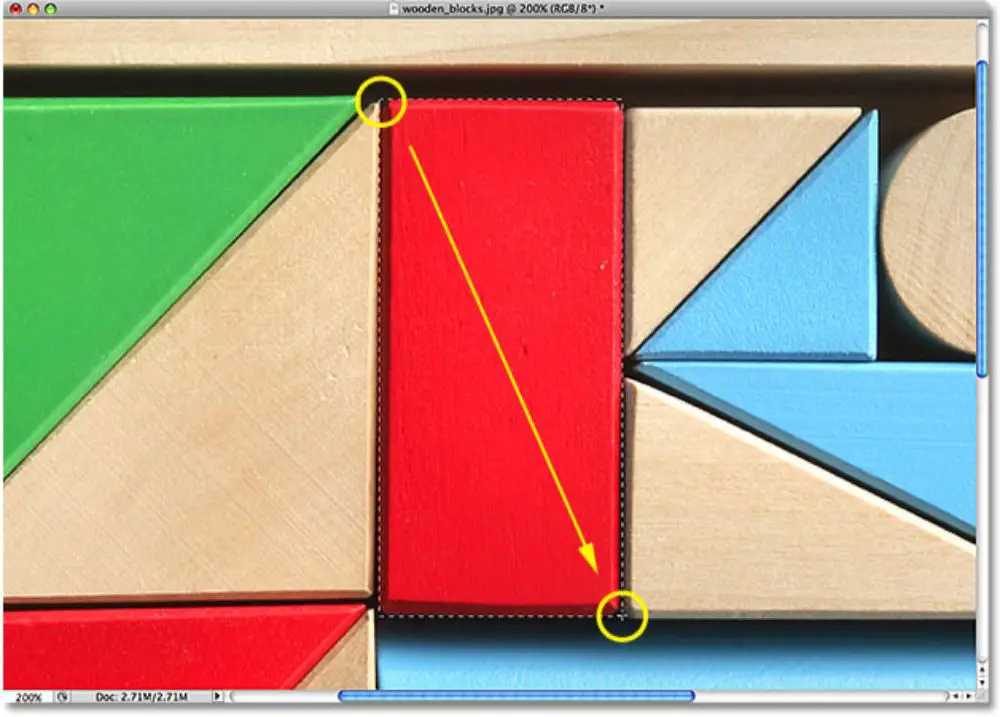
If we talk about the image displayed above, you can identify a red block on the first row. Let’s try changing the colour of this block using the rectangular Marquee Tool. Remember for Photoshop the block isn’t a block or any form, it’s just a collection of pixels like all other parts of the image. Hence it is essential to use your selection tool accurately to make the right selection. Since the shape of the block we want to colour is rectangular, using the Marque Rectangular Tool would be easy.
Start by selecting the Rectangular Marquee Tool. You can either access it from the Tools Panel or using a keyboard button’. Now, as we learned above, start with making the selection from the up-left edge of the block. Hold down your mouse after making that selection. Now pull the selection to the low right corner of the block.
Realigning your selection:
Though the process is relatively simple when starting, it is possible to not get the corners accurately on the first attempt. However, you need not panic because of this, as you can hold down the spacebar on your keyboard and pull your mouse for moving the selection exactly where you need it to me. You don’t have to start over each time. This saves time and proves to be very convenient. Once you’re in alignment that you want. Let go of the spacebar and continue pulling the selection.
Now as soon as you release the mouse, your selection would be complete. You’ll realize there is a selection outline around the borders of the block. This means any modifications you make now would only affect that particular block and nothing else.
Changing the colour of the selection:
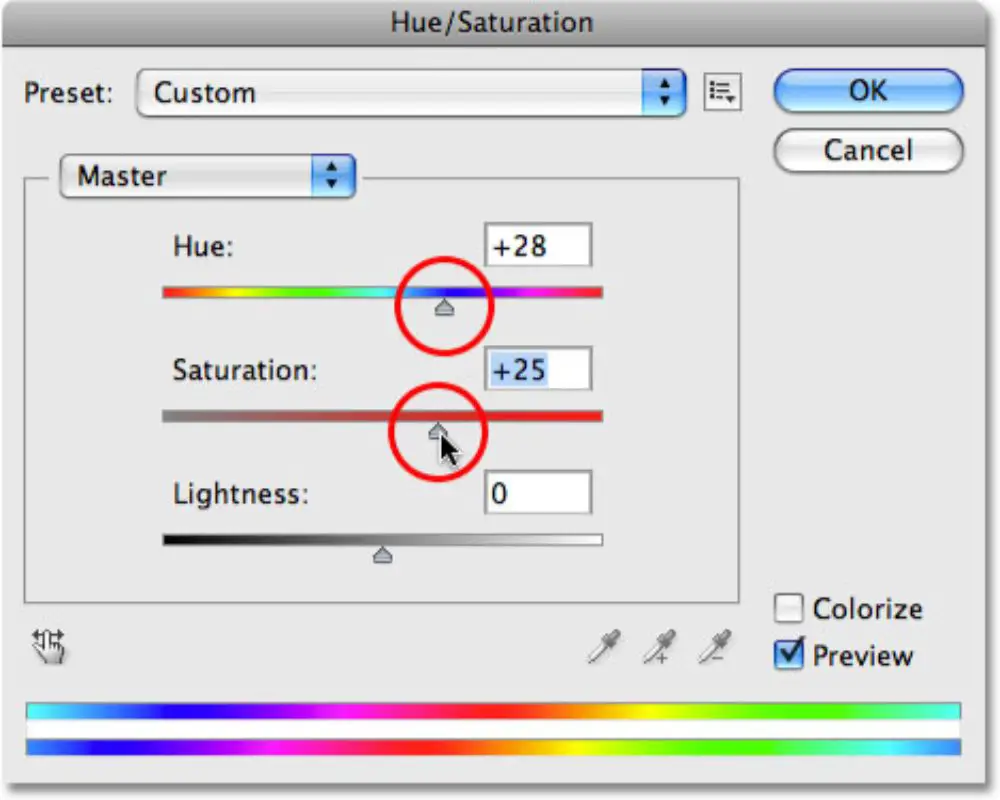
Now we would convert the colour of the block. For doing this, select the Hue/Saturation image adjustment option from the menu labelled as Image. Or you could access it with cntrl+u keyboard button. A new popup would appear, for Hue and Saturation. For instance, assume we want to change the colour of the block to orange. For changing the colour, you could see a noticeable change just by using the slider for Hue to the left and the right. There is a colour bar below the slider, too that helps understand what colours lie where. Now if you aren’t satisfied with the saturation of the colour, you can adjust that as well. Dor reducing, pull the slider for saturation to the left and to the right to increase. Keep tweaking unless you find the option you like. Once done, click OK and exit the dialogue box.
Deselecting the selection:
Once this is done, you might want to edit the other aspects of your image still. For this, you need to deselect your selection from the block. Do this by opening the Select menu and choosing Deselect, or use the keyboard button control+D.
2. Square Selection:
As discussed earlier, there are primarily only two selection shapes available for Marque Tools; Rectangle and Ellipse. However, this doesn’t limit the functionality of this tool. You can create a square selection using the rectangular tool. There are two methods of forcing the rectangular tool to make square selections.
Method 1:
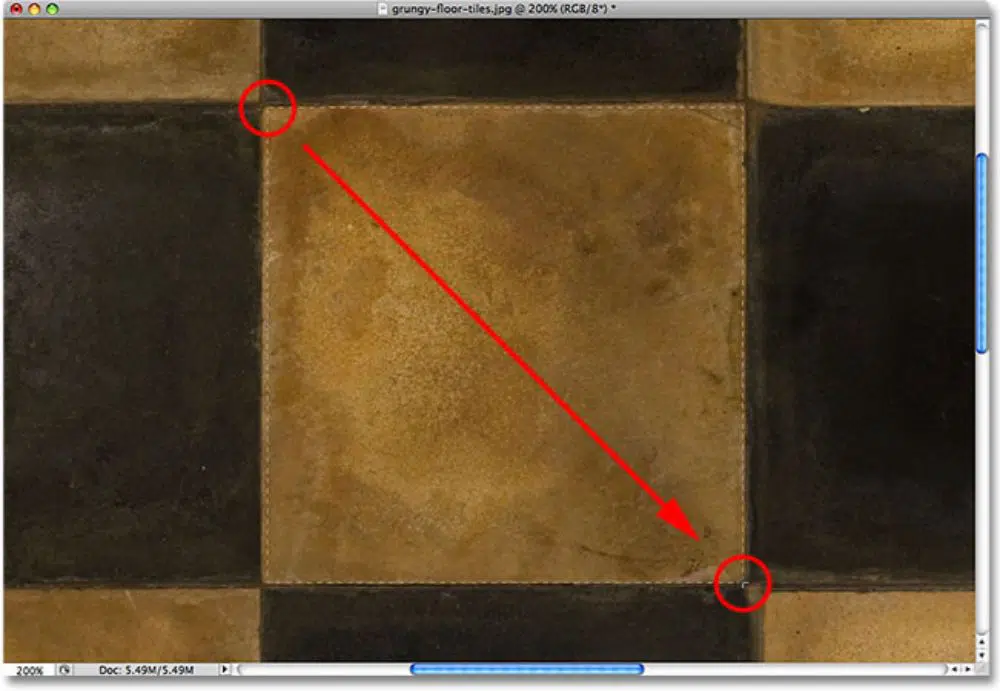
The first method is a bit lengthier, but it is always good to know all the methods to do a certain thing. If we talk about the image above, we would be focusing on the centre tile. Let’s use the centre tile image for creating an impressive background texture. Since this tile is square, our selection tool has to be square. Click on the Rectangular Marque Tool and go to the Options Bar. The options bar would display options that are available for the mentioned tool. The few parameters that you can change from this option tool are; style, and height and width.
By default, the style would have been set as normal. This means we are free to move the selection as we like. There’s no limitation to the dimensions and proportions as well. The first step to using a square selection is modifying this option from normal to Fixed Ratio. Using the basic principles of mathematics, we know a square has equal height and width. Manipulate the value of the height and width column to 1:1. Now, you would be easy to make a square selection for the tile we want to select.
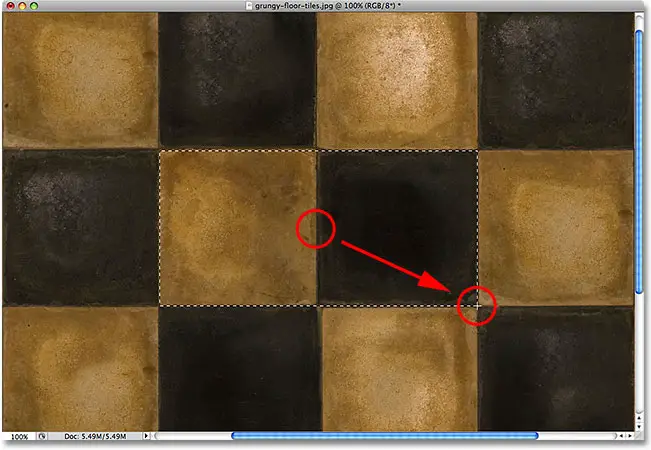
Start with the process we have been following so far. Start the selection on the up left corner, and pull the mouse down to the right low corner while holding the mouse. Hold spacebar if you need to make adjustments to your selection. Release the spacebar, and continue pulling till you are satisfied with the selection. The only difference is that our style is selected as a fixed ratio, which would help it be a square.
There are limitations in using this method. The adjustments made to the Options Panel don’t revert to the default settings once you’re done with making the square selection. This could lead to wasting much time for your future projects or should you have to make any other changes in the same document. This is because you’d often forget reverting all the parameters to original values and hence use square selection where you wanted to use rectangle selection. Hence it is essential always to remember to revert the style to Normal before you move on to any other work.
Method 2:
Another approach to achieving a square selection is by using a keyboard button. All you need to do is, start with selecting the Rectangular Marque Tool, and pull the selection from up left corner to the low right corner. While you’re in the process, press shift key and continue to pull.
You see that the rectangular selection would suddenly turn into a perfect square selection. Now release the mouse to finish your selection. After this, let go of the Shift key. It is crucial to remember the order. If you first let go of the shift key before releasing the mouse key, the outline of your selection jumps back to a rectangular shape. Then press and hold the Shift key again to change it back to square. You can’t even press and hold the shift key before starting your selection. Doing so activates the Adobe Selection mode. This would create confusion and give you complex and random results as you would start a new selection before ending the previous one.
Hence it is important to remember the order, i.e. Use the keyboard button> Select the starting point> Start pulling >press and hold the shift button>release the mouse for completing the selection>now release the shift button.
The Centre to Outside Approach:
Till now, we have studied how to make square or rectangular selections from the up left corner to the low right corner. However, this is not the only method to use the Marque Tool. A different approach can be making selection from the centre.
Start with selecting the Marque Tool. Start from the centre of the object you want to select and start pulling your selection outwards. Now press the Alt key and continue pulling. By pressing the Alt key, your selection starts expanding outwards in each and every direction. Continue pulling your selection from the point you started on till you cover the entire object you wish to select. Now release the mouse button and complete the selection, then release the Alt key.
Similar to the previous approach, the timing and hierarchy of the steps are crucial. Releasing the Alt key before releasing the mouse makes the selection shift back to its original format of the up left to the low right approach. You then would have to press alt again to get it back to the centre to out approach. Pressing and holding the Alt button before you start your selection takes you to the Subtraction selection mode.
Hence remember, the right order to follow is Use the keyboard button> Select the starting point> Start pulling>press and hold the Alt button>release the mouse for completing the selection>now release the Alt button.
The Circular Marque Tool
The Marquee Tool is situated in the first place in Tools panel if you have double column and second place if you have a single column tools panel. The icon of this tool is Elliptical. Start by selecting this tool. Use the elliptical marquee tool by clicking the mouse at the point where you want to begin the selection. You can switch between the Circular Marque Tool and Rectangle Marque Tool by pressing the keyboard button M.
Circular selections:
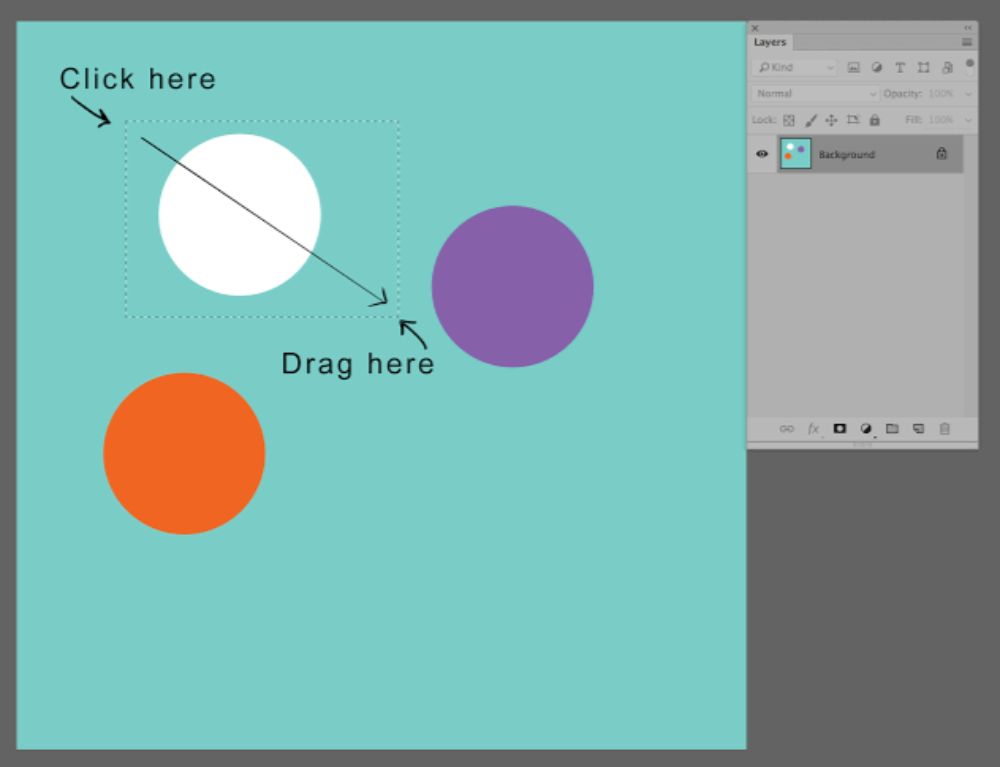
Select the elliptical marquee tool and click on the point where you want to begin the selection. Hold your mouse and pull to the direction, you want to expand it to. Once the selection outline covers the entire area, release the mouse button. Your selection would now be complete.
Suppose you want to add a vignette option to any photo like the one above. Using the Elliptical Marque Tool would make the process very easy. First, add a new blank layer. Here you can create any effect without damaging the original picture. Choose the new layer by clicking the New layer icon from the Layers Panel. Now fill this layer with white using Photoshop’s fill feature. Go to Edit>Fill and select White in the Contents section of the dialogue box. Press OK and exit the dialogue box.
Now you would realize that the entire image is blocked with the white fill layer that you just created. You can temporarily hide the first layer with the eyeball situated next to it. Now that you can see the original image, you can add the vignette effect. The way you want to make the selection has the same two approaches, upper left to low right or centre to outwards.
The main contrast between rectangular marque tool and elliptical marquee tool is that it is easy to remember your starting point for rectangular marque tool as the corner you start from remains fixed irrespective of how long you make the selection. However, for the elliptical tool since it’s circular, there are no fixed corners. The selection keeps going away from the start point, which can get a little trickier to deal with. Fortunately, you can reposition the select alignment just like in rectangular one, holding down the spacebar.
For circular selections go to the options menu and select fixed ratio style and input the height and width to 1 each.
You can now make the necessary changes to your vignette to get the desired result to your image.
In this article, we learned about the art of Mastering the Marque Tool in Photoshop. Keep practising, and you’ll refine your selection skills in no time.
