A clipping mask in Adobe Photoshop is generally a shape which is called a clipping path. It masks any object that is placed below it, because of which only the content that is inside the clipping path remains visible. The photo that you are using as your base can be of any format like vector, drawing, raster photo and more.
However, a clipping path can only be a vector object, not a photo. A few logical conclusions and guidelines while using clipping masks are; the clipping mask should always be placed on top of an object that you want to clip. You can only have a single clipping path; however, you can clip more than one objects together. All the clipped objects need to be in the same layer group.
Clipping Masks V.S Layer Masks.
Clipping masks can be used as an excellent means for controlling the visibility of a layer. Layer masks serve a similar functionality. Although the end outcome looks similar, clipping masks differ for layer masks by a right margin. A layer mask takes advantage of black and white to show or hide different sections of the layer. In contrast, a clipping mask uses the content and transparency of one layer to control the visibility of another layer.
Getting Started:
For creating a clipping mask, you need two layers. The bottom layer is used to control the visibility of the layer above it. By this definition, the bottom layer becomes the mask, and the top layer is said to be clipped to the mask.
The bottom layer includes the original contents that can be either shapes, pixels or type. The same content is visible on the layer above it. However, if you make any section of the bottom layer or mask layer transparent, the same area for the clipped layer would turn hidden. Let’s get a better understanding of Using Clipping Masks in Adobe Photoshop with this detailed tutorial.
1. Create two layers:
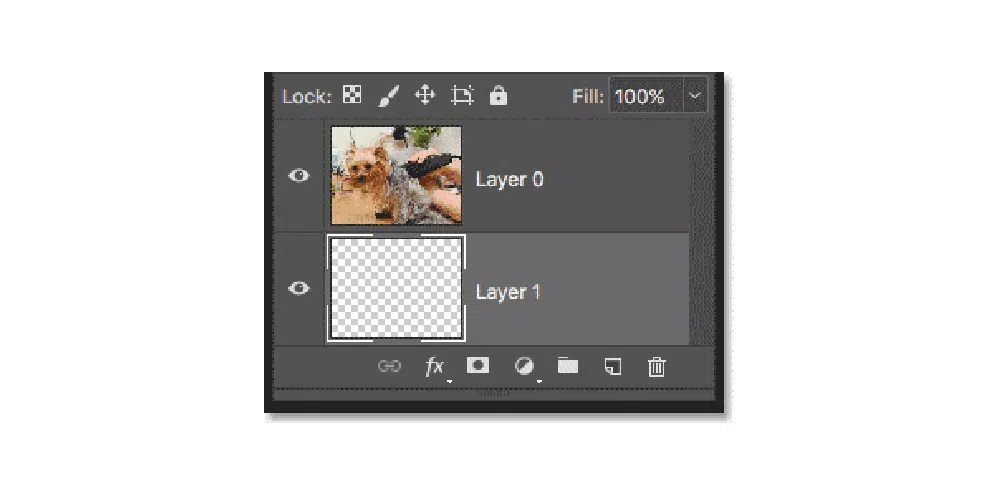
Open the image you want to work on, and you would see the image is shown on the Background layer as it’s the only layer on the document currently. Now, as discussed earlier, we would need two layers, one to act as a mask, and others to be the clipped layer. Start by unlocking the background layer by pressing and holding alt key on the keyboard and double-clicking the Background Layer. Once it gets unlocked rename this layer as Layer 0. Now press ctrl key and click on Add New Layer Icon.
By doing so, a new layer with the name layer 1 would get created below the photo. Now we have two layers in the background. Now we would turn the bottom layer to a mask layer, and the layer above would be converted to a clipped layer to this mask.
2. Select which layer to clip:
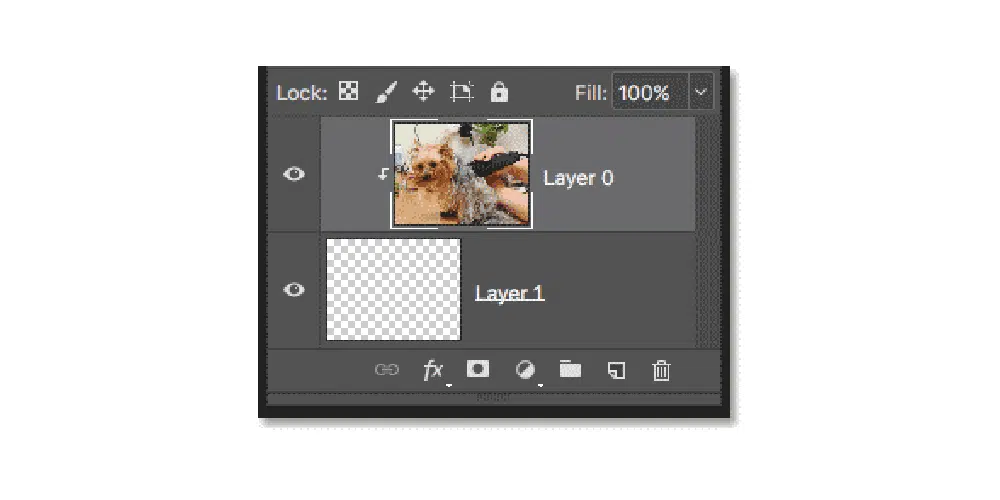
Before starting the entire process, we first need to have a clear understanding as to which layer is going to be clipped to the layer below it. For our image, Layer 0 (top layer) would be clipped to Layer 1 (bottom layer). Hence make sure you have the top layer selected.
Now create the clipping mask by going to the Layer menu and choosing Create Clipping Mask. Now the layer panel would show two layers, top layer, i.e. Layer 0 and a bottom layer, which is layer 1. You would notice there is a small arrow on the top layer that points towards the bottom layer. This indicates that the top layer is clipped to the bottom layer.
So far, we have managed to hide the image from view using the clipping mask we created. This is because the mask layer, i.e. Layer 1, has no content as of now. It is transparent. As we know that in a clipping mask, any area present on the top layer is situated directly above transparent areas of the bottom layer, and hence hiding them. Our bottom layer has no content; hence, it is entirely transparent. This is why no part of the above image is visible.
3. Releasing the Clipping Masks:
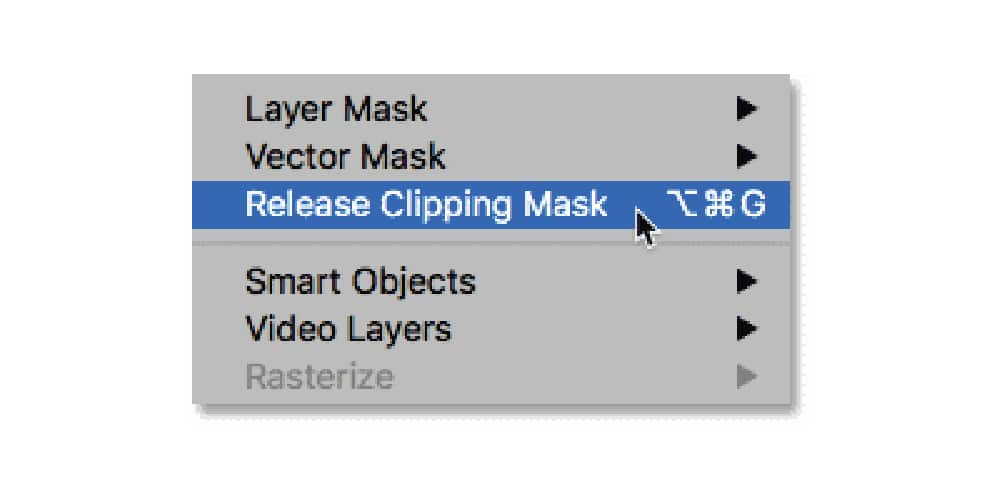
This isn’t what we ideally want to achieve. For practical use of clipping masks, some portions of the image need to remain visible. Let’s start with getting rid of the clipping mask, for now; we would come back to it with a better approach. To remove the clipping mask, go to the Layer menu and choose Release Clipping Mask. Now you can see the top layer is not right intended and the arrow is gone too, this shows that the top layer is no longer clipped to the bottom layer. Now you can see the image/content of the top layer again.
4. Fill content in the Clipping Masks:
Now we witnessed, that the last time the issue was that our clipping mask was a transparent layer with no objects or vectors on it. This led to complete transparency of the entire image. Now let’s add content to the bottom layer. Click on the top layer’s visibility icon and hide the image to see what you’re doing. Now select the bottom layer and activate it.
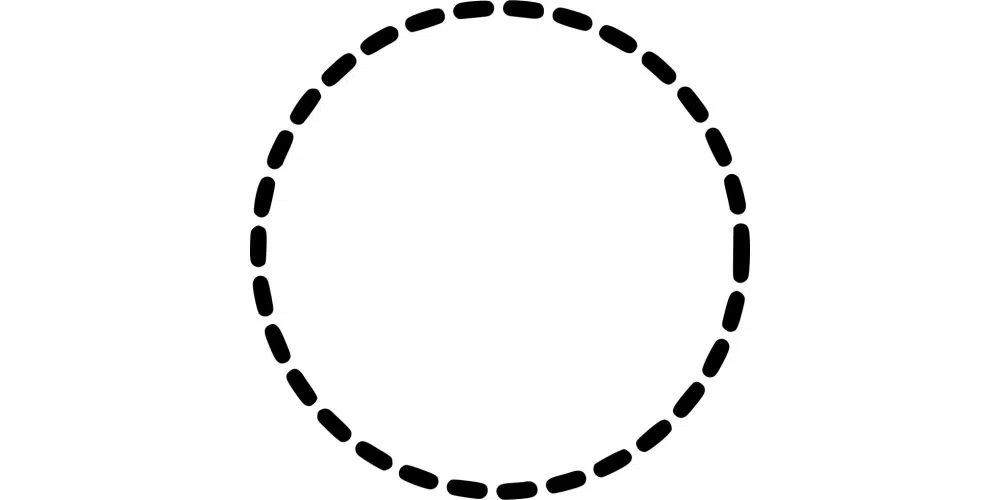
Firstly, for adding content head over the Marquee Tool and select any shape you want to make use of from the tool. For our case, we would stick to the Elliptical Marquee Tool. Secondly, after selecting the tool, click and drag an elliptical section outline at the centre of the document. Next, go to Edit and choose Fill. Now you should choose the Contents tab to black, and click OK. The selection you made with the Elliptical Tool is now black. Now for removing the selection outline from the borders of the shape go to Select menu and choose Deselect.
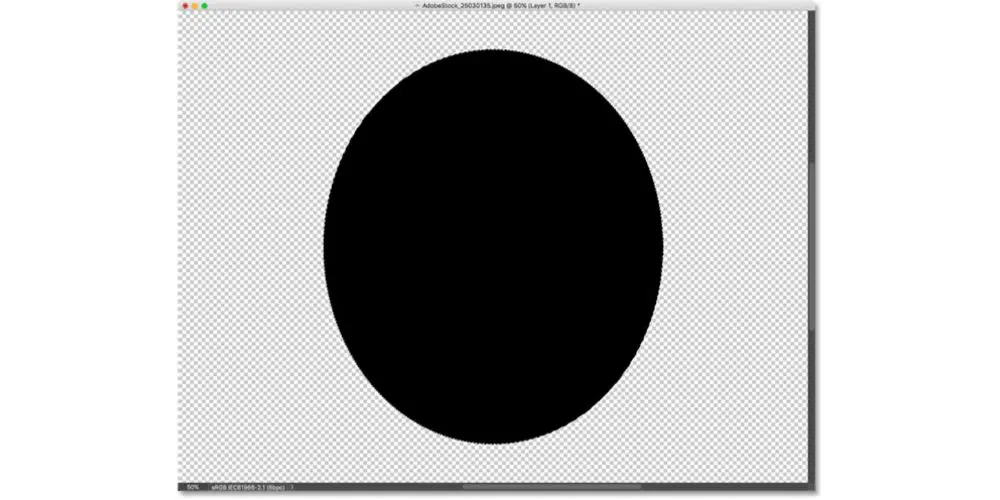
You would notice that as opposed to the previous attempt, we now have some content in the centre of the bottom layer. However, all the area surrounding the content remains transparent. You can see the content is reflected in the preview panel at situated in the layers panel as well. If you look at both the layers on the preview thumbnail, you’d understand that some of the content from the top layer sits exactly below the content you created for the bottom layer while the other part of the photo is still sitting on top of transparent areas of the bottom layer.
5. Create another clipping mask:
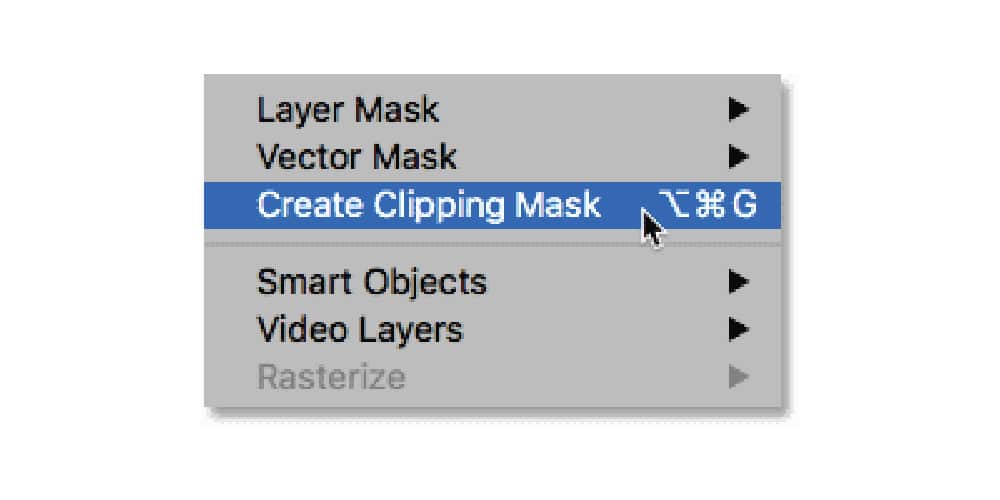
Now we are better equipped and hence ready for rightly using the clipping mask. Hence we again create the clipping mask by selecting the layer that needs to be clipped to the bottom layer. Firstly, click on the top layer and select it, secondly make the layer visible by clicking its visibility icon. Now go back to the Layer menu and choose Create Clipping Mask.
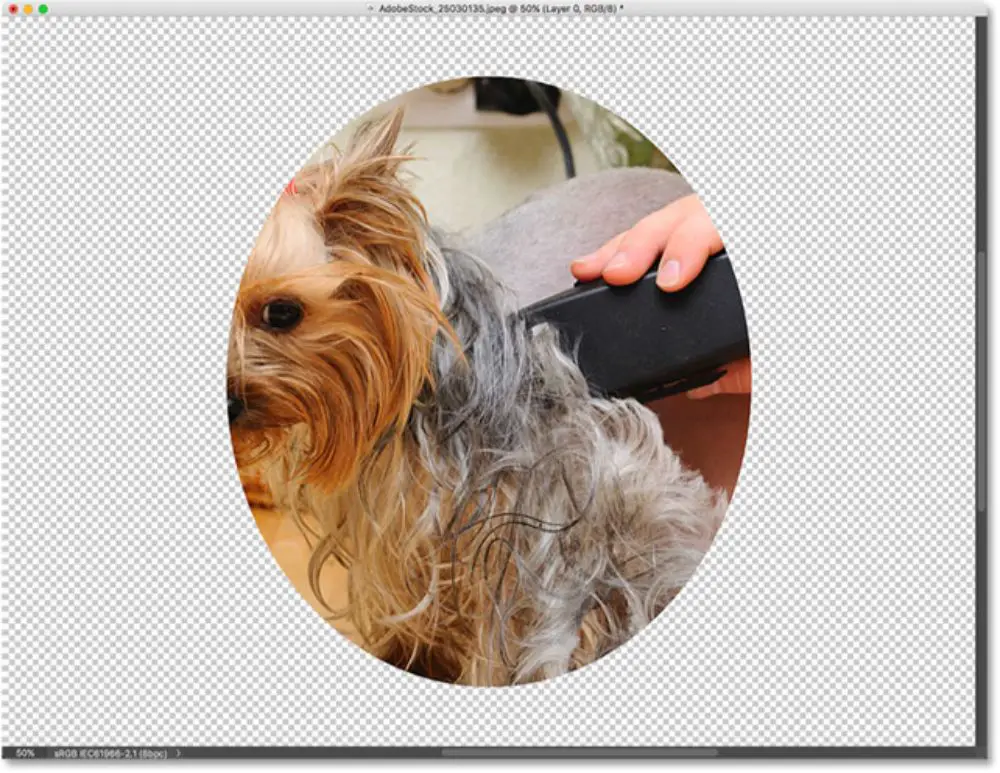
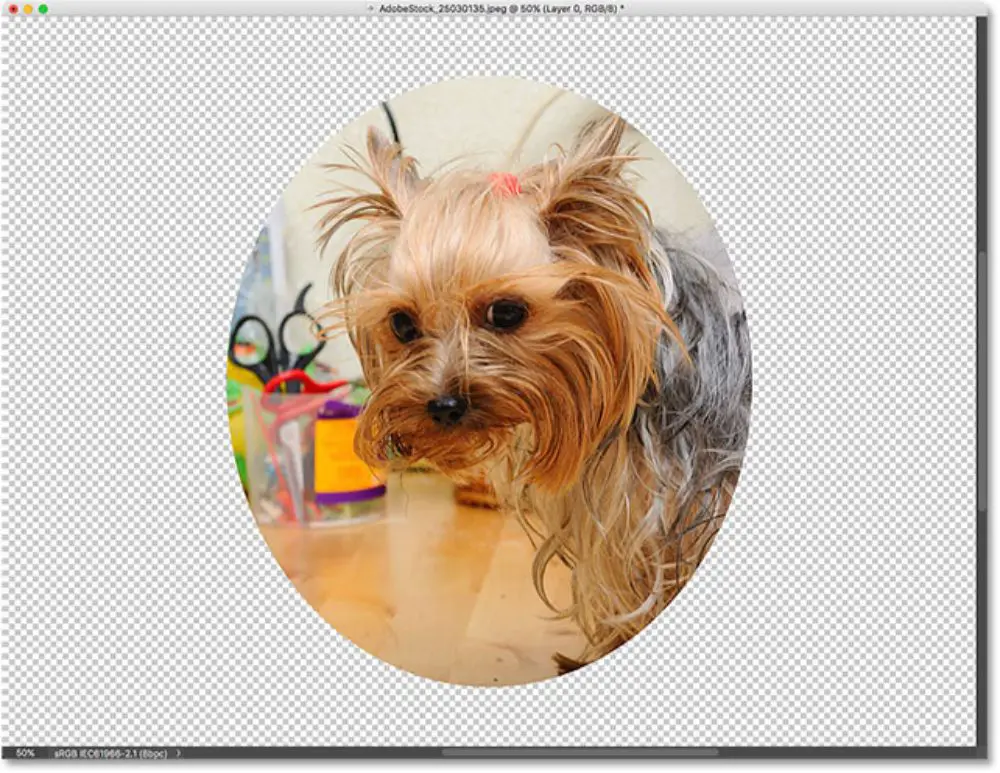
Now when you see the document, you’d see that the content of the top layer that sits directly above the shape we created for the bottom layer remains visible however the parts of the photo that rests on the transparent portion of the bottom layer remain hidden.
6. Adjust the content within the clipping mask:
It isn’t possible and not worth the effort to create a shape in the bottom layer according to the position of the content of the top layer that you want to keep visible. It’s not worth the effort as Photoshop has more accessible ways to bring the content you want to remain visible under the object of the bottom layer. Use the Move Tool to re-position the content within the mask tool. Click on the photo and drag it till it’s in a position that you want. As you start moving the image, only the area that fits the shape below remains visible.
This is the final result.
Applications:
Layer masks work best for blending layers with smooth and seamless transitions; however, clipping masks are best for situations where your photographs need to fit within a clearly defined shape. The shape could be either something you drew from the selection tool as discussed above. However, this isn’t the limit of how you could take advantage of clipping masks. They can also be used for filling a vector shape with an image or placing the image inside text.
One widespread and frequent use of clipping mask is adjusting photos in a photo frame. Let’s discuss the process of that’s done.
1. Get the basic essentials:

Firstly, we all know we at least would need two layers for using clipping masks. Secondly, you should choose the image you want to frame inside the frame and open it as one layer. This layer has the content has it would be made the top layer.

Next, select an image of a frame from the net or use an image you have. This image would be the background or the bottom layer. Hide the top layer for now and click on the background’s layer to select it.
2. Draw or select the shape:
Clipping masks work best when you want to fit your image within a shape for instance in our case, the shape is the insides of the photo frame. The area has a solid black colour currently. Firstly use the Magic Wand Tool, and select the area inside the frame. Secondly, copy this area to a new layer by going to Layer Menu and clicking New and selecting Layer via Copy. Now you can see Photoshop creates a separate layer of the insides of the frame that you selected using the magic wand tool. This layer lies between the top layer and the bottom layer we created so far.
3. Create Clipping Masks:
Now we would turn back the visibility on for the top layer by clicking the visibility icon. Follow the same process of creating a clipping mask from the Layer menu or use another shortcut that requires you to hover your mouse over the two layers you want to select while you press alt key on your keyboard. The cursor changes to a clipping mask icon. Now click on the dividing line between the two layers to create a clipping mask.
Now if you look at the image, it sits well inside the frame and is visible there only because that is the only selected area that has content in the bottom layer. The rest of the photo remains hidden as it is situated above areas where there is transparency.
Next, you could think to use the Move tool and adjust your image and get done with the process. However, many times it happens that the image we have in hand might not adhere to the size of the frame therefore merely moving the image wouldn’t allow you to fit the image inside the frame. For this, you need to resize the content within a clipping mask. Use Photoshop’s Free Transform command for achieving this. In our case, the photo is too big for the frame; hence, we need to resize it by selecting Free Transformation from the edit menu.

This would place the free transformation box and handles around the image, even the areas outside the frame. These areas won’t be visible as clipping masks are hiding it for resizing the image press the shift key and click on the corner handles. Drag the image inwards. Holding shift key is essential as it locks the aspect ratio. As a result, it ensures that the image doesn’t get distorted.
Once you’re satisfied press enter on the keyboard to get out of the Free Transform. The photo fits the frame perfectly.

This was the 6 Steps Tutorial for Using Clipping Masks in Adobe Photoshop. With enough practice and dedication, anyone can master the art of using Clipping marks and use this technique for various purposes. Start practicing today and keep refining your skills.

