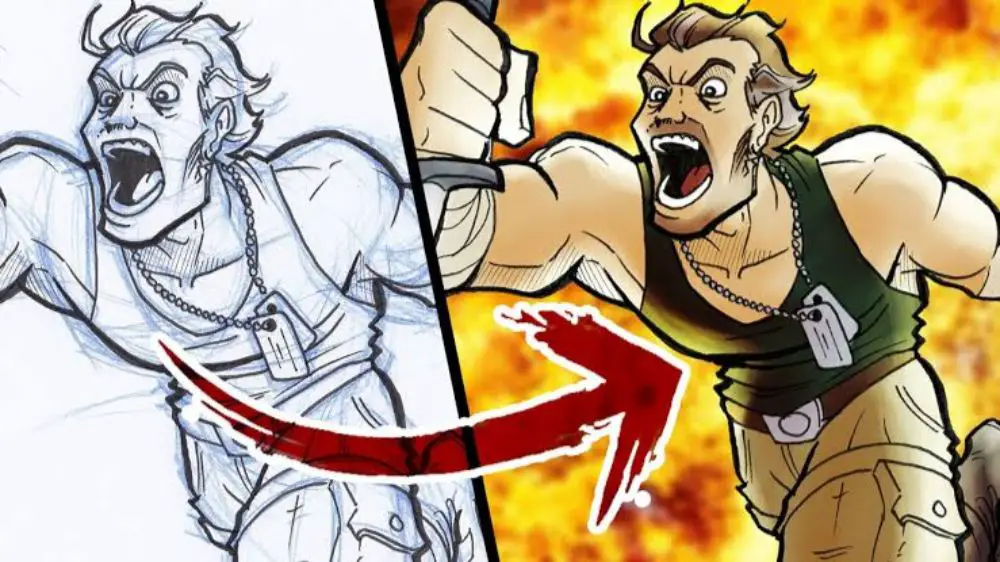
For decades and centuries, the process of hand-drawn art has been practiced. This practice is carried out by drawing your artwork on paper or canvas, or any other physical, tangible surface. It has been in practice for a long time, and many different art forms have been refined and improved over the years. In today’s graphic design, technology has seen constant improvements, with everything accessible at a click. Digital vectors have gained widespread popularity and are equally considered as an art as much as hand-drawn illustrations are.
Advantages of Digitized Vectors:
The advantage with digitized vectors is that it can reach many more people, and can be enhanced with proper retouches and refining. It also helps avoid situations of any unpredictable damages to the art. For this reason, the process of transforming Illustrations into Digital Vectors has been gaining widespread popularity. It is enabling artists and designers to collaborate, reach more clients and mark your impression with more impact around the world. Also, vectors are great files when it comes to flexibility of choosing size and scale as they’re easily scalable without any loss of quality. Hence this allows you to use your illustration for different purposes easily.
Converting hand-drawn illustrations to digital vectors allows you to enter new market places for your skill. For instance, if you’re a calligraphy lettering artist, you can digitalize your artwork and place it on different products. These could be merchandise like clothes, gift items, personalized items and more. You don’t need to sell the original piece of your art itself, but copies of it when you convert it in a digital vector. Another way to earn from your design is by licensing it to designers and companies. They can use it in their products.
There are some pre-requisites or guidelines to keep in mind before getting started with the process of converting your illustrations into digital vectors:
1. Always Use a Clean White Paper:

Ensure using a clean white paper, irrespective of what you’re drawing. This ensures accurate scanning of your drawing. It is ideal to use white paper because the coloured paper could hamper the digitization process. If you wish to add a colourful background, later on, you can do it digitally later on.
2. Refining the sketches before digitalization:
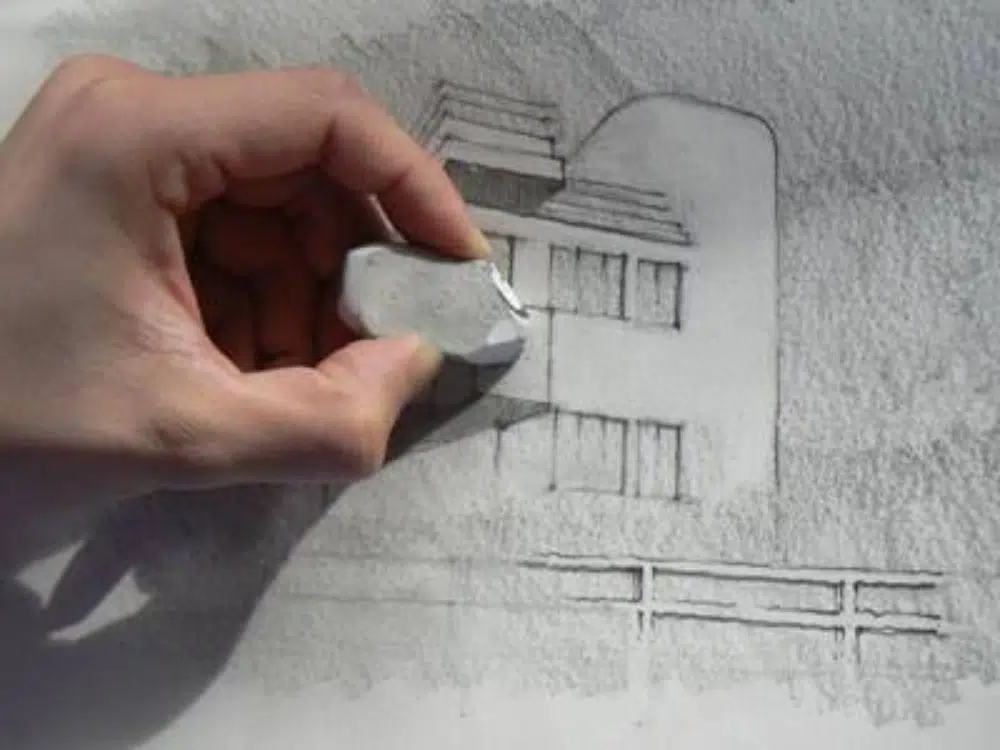
Make some fine adjustments to the drawing before getting started saves effort and time. It also makes for a more finished product at the end. You can use erasers, pen or sketch pens to better outline your sketch and getting rid of unnecessary lines. Now erasers also need to be clean since dirty erasers could leave unwanted marks on the drawing that can be difficult to get rid of.
3. Trace your drawings using a Tracing Paper:
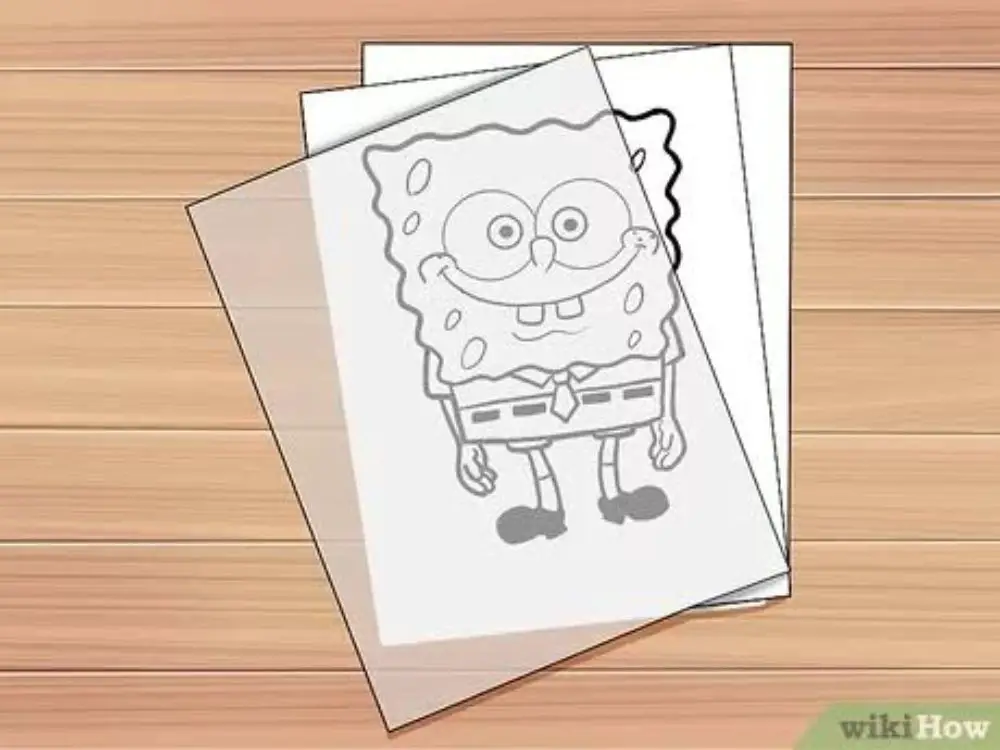
Not many artists know about this nifty trick, but it helps a lot in the process. Once you have drawn your illustration, it is always helpful to place a tracing paper on top of it and trace the drawing to a new fresh sheet. This helps because the borders and the overall outlines and details would be much crisper now since you won’t have multiple lines or strokes or smudges from constant erasing.
Now that we are clear with the pre-requisites, it is essential to understand how to effectively transform your illustrations into digital vectors by following 9 simple steps:
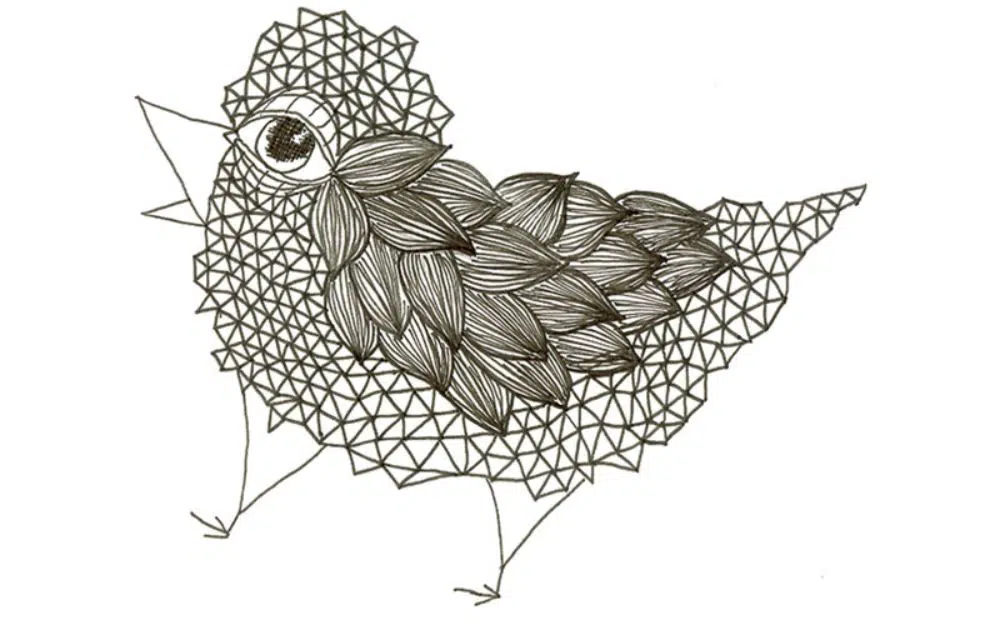
1. Draw the Design:
You need to draw the design in your mind, on a piece of paper, using the traditional method of pencil and paper. However, this isn’t going to be like one of your regular drawings as it has to serve a different purpose, i.e. being converted to a digital vector. Some certain tricks and tips help ease this process.
Firstly, if you’re using multiple colours for your sketch, make sure you use strong colours for the scanner to be able to comprehend correctly. This is often easier to achieve when you use a marker as they have a more noticeable impact and are thicker.
Secondly, you’d want your outlines to be really strong and easy to demarcate. A simple quick sketch won’t work as Illustrator would not be able to comprehend it.
You might have a practice of making quick doodles for your regular practice, but when you want to convert a particular project into a vector, you need to pay close attention to the detailing. Avoid using any different coloured paper for the drawing as the contrast between black charcoal of the pencil, and white paper is easier to be picked up by Illustrator.
2. Make your Design digital:
Get started using any of the following two approaches. You can either scan the design or use a high-res picture of the drawing. Generally, scanning provides better results as it can easily differentiate between the blacks and the whites. Also, it comes with options like setting high contrast. You can also add single tone colours, which further improves accuracy. With taking a high res picture, the chances of missing out on clarity still exist.
Apart from that, there might be chances of producing shadows or overcasting in the picture due to external factors. Having said this, many times low-quality scanners also aren’t most successful for rightly digitalizing your design, and for this, you should use a good quality scanner. Make sure the quality of the image is 300 dpi (dots per inch) at the least before starting working on it.
3. Clean it up:
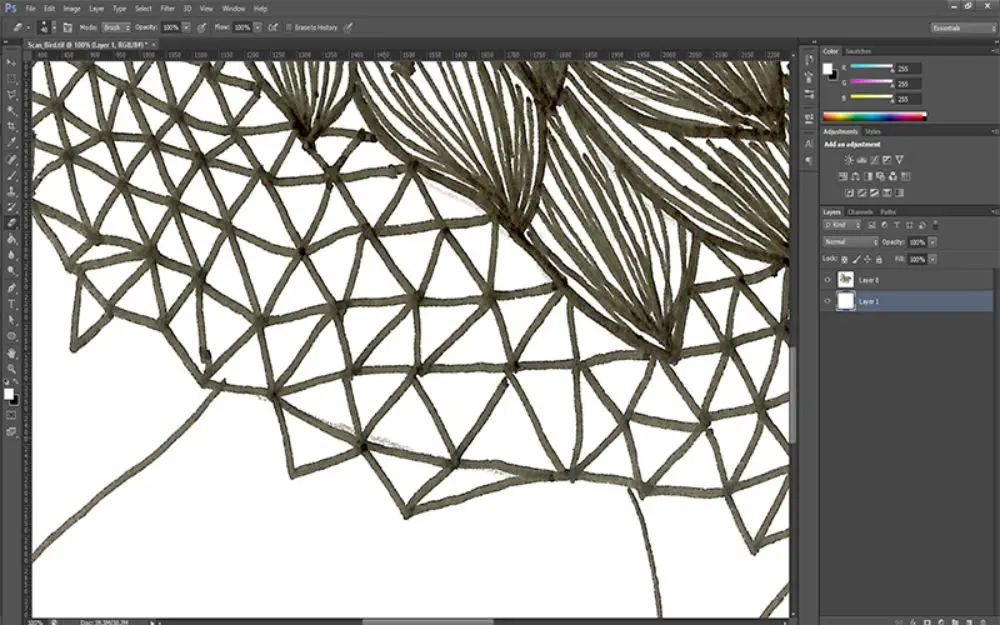
After digitalizing your design and having a digital format of your drawing, clean up the rough edges and any unwanted elements. Do this by opening your design in Adobe Photoshop. The more unwanted details you can get rid of from here, the easier it would be for you to refine it in Illustrator in later stages. Use the Eraser Tool and other such nifty tools from Photoshop to get a cleaner design.
4. Make the required adjustments:
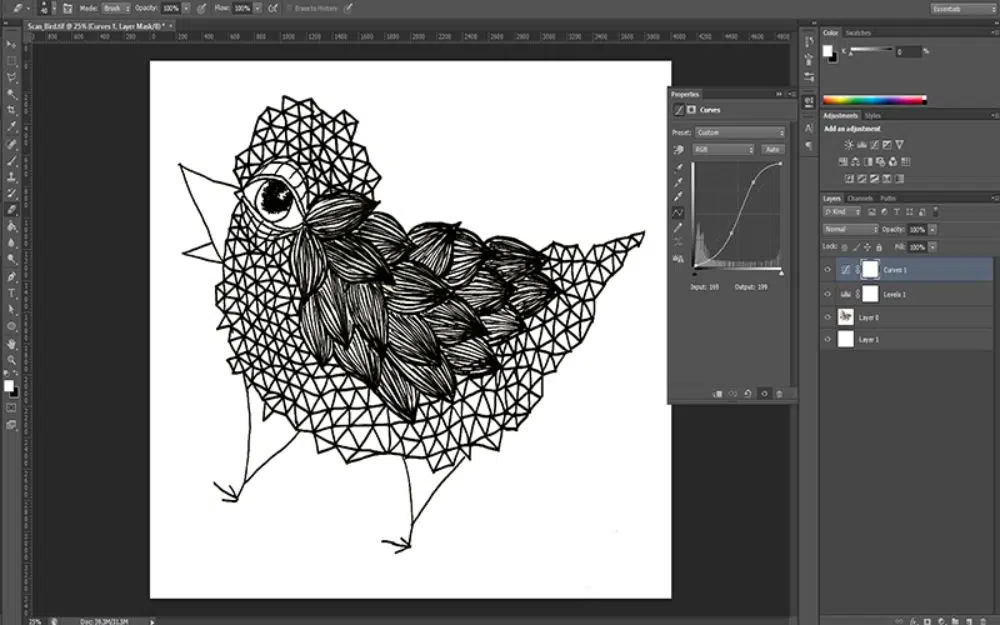
Photoshop has various tools to make your drawing more black and white than it originally is when scanned. A stronger image would only make it easier for you to trace it in the later stages. One such method of tweaking the black and white aspect is using Levels (control+L), and another effective way is using Curves (control+m). Once you’ve made satisfactory and necessary changes, save the file in jpeg format.
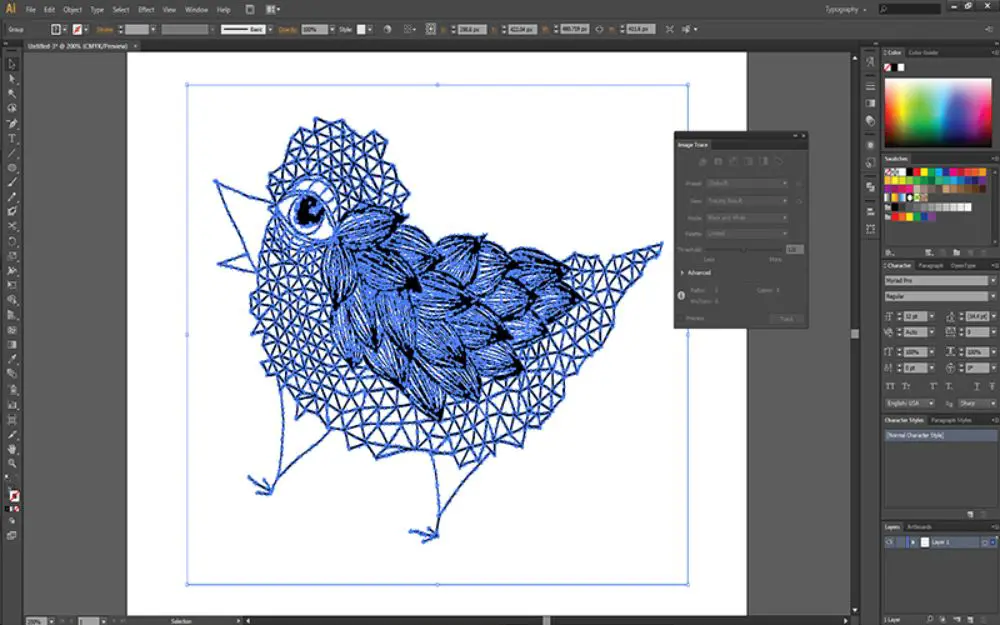
5. Start tracing your design:

Once you’ve made the necessary changes on Photoshop and have your jpeg file ready, switch to Adobe Illustrator. Open the application with a fresh new empty document. Now navigate to File, then select Place and import your jpeg file. Now click on the picture to select it, then go to the window and select the option to image trace.
6. Experiment with existing material:
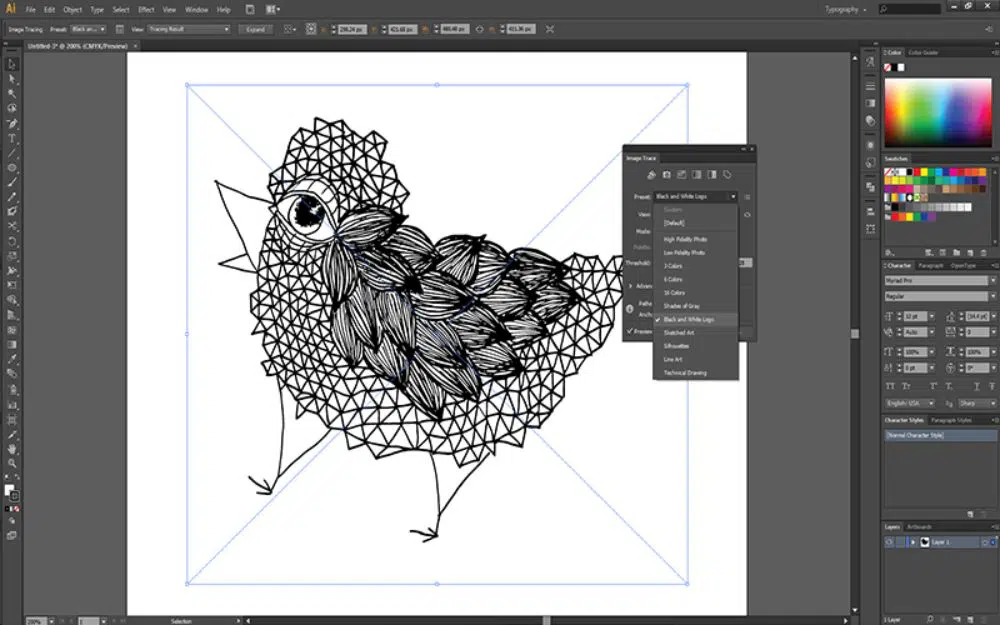
While it is true, that doing everything from scratch or by yourself can result in more accurate and efficient results, many times experimenting with the existing presets can provide you with very similar results for much less investment in terms of time and energy. Click on the preview option and then on the preset menu in Image Trace, and browse through the choices till you discover the one that best suits your design.
If the trace isn’t picking up your drawing at first go, you could still play around with the presets and thresholds till you find a solution that works best for you. When you select the option for Image Tracing, you might get a popup for warning you that your image is large and suggest reducing the size and rasterize it. This is mostly a precautionary step which popups irrespective of the fact that it’s required or not. You should check if your computer has enough free space, and if it does, you shouldn’t rasterize the illustration as it would lead to loss of all hand-drawn details from your high-quality scans.
7. Turn your Traces into Paths:
Once you have traced your drawing, you can go up to the toolbar, and click on Expand option. This automatically transforms your traces into Paths. Once you’re done tracing your image, you might feel like you’re done with the process as you’d see a neat, refined selection. However, you need to check for unwanted white spaces that might have been picked up on by the image trace option.
This is because it takes the white space around objects as well while tracing. Carefully examine for such white spaces inside your design that are unwanted, and remove them by clicking on them and deleting them. One other way of doing this is by using the Layer Panel and selecting the white areas there. Now you can drag the Layer to the trash using the Layers Panel.
8. Group your Objects: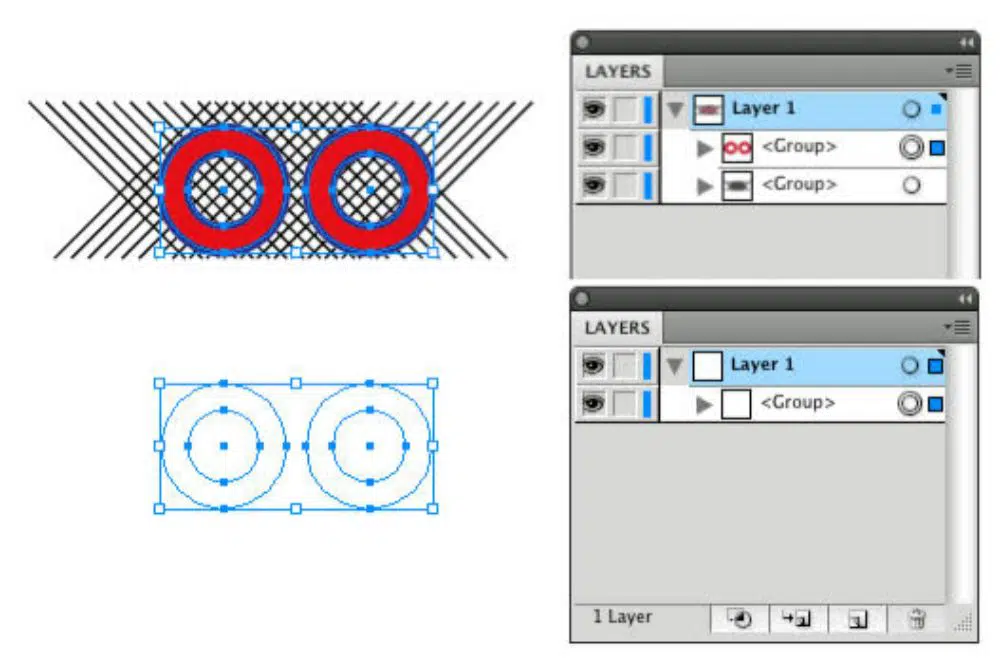
Once you complete the tracing of your drawing, you should group your objects. Many times it is possible that your drawing would only have one core element(object). In such a case you won’t need to group it. However, if you’re drawing an action scene, or a scenery too, chances are you’ll have more than one objects. Now to make sure that nothing stays afloat or unaffected by your edits, you need to group all the objects together using the keyboard shortcut control+G. Repeat this process twice for grouping everything together.
9. Smooth out and edit the artwork:
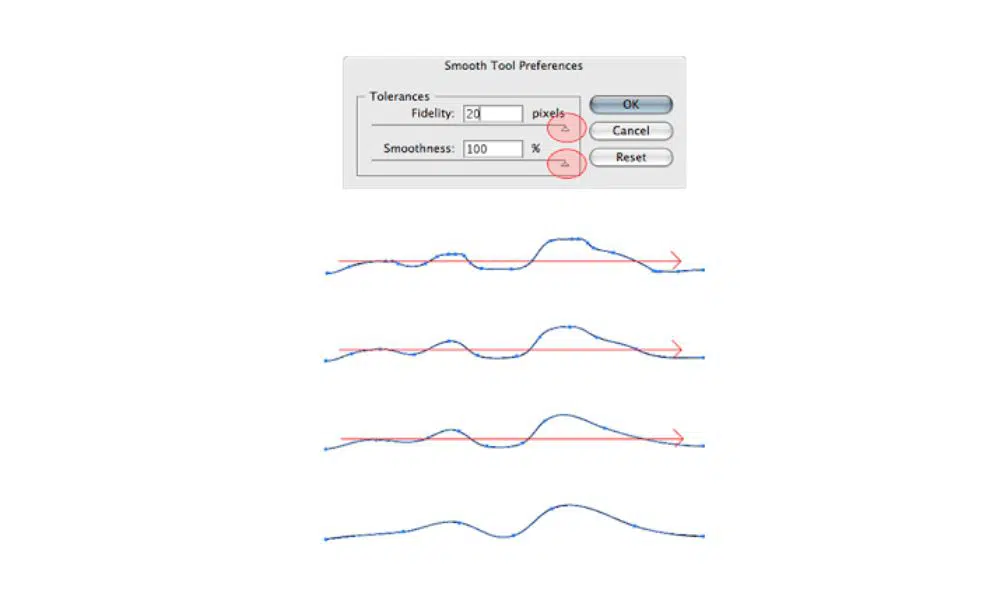
After removing any unwanted background from the artwork, you should invest time to fine-tune and clean up the artwork. Use the Smooth tool that is to your left side toolbar. Drag it along the paths you want to move it to, by selecting the object. Same goes for hand lettering artwork as well. Now if you want to apply colours to your artwork, do so by selecting your artwork. Now fill it with colours using the Swatches Panel.
10. Export the File:
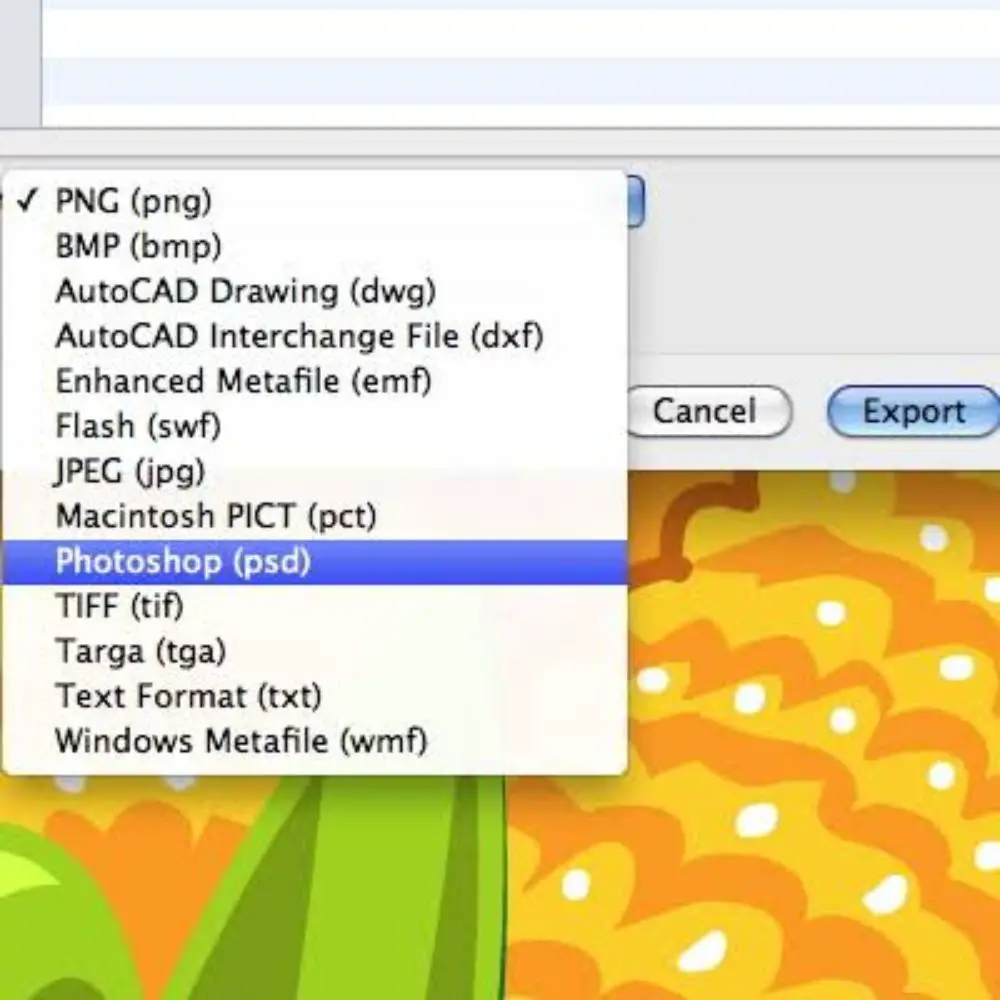
Adobe Illustrator saves the file in AI format. This format is useful, especially if you want to save a master copy of your work. However, for different purposes, you might want to explore the different formats illustrator allows you to save your file as. The various formats available with Illustrator are saving your file as PNG, JPEG, SVG and PDF. You can also save your files as PSD files for further working on the project using Adobe Photoshop. Be sure of the utility of the and purpose you want it for. Then, select the associated file type and export the file.
There are other methods you could use for transforming illustrations into digital vectors as well. A lot of them are much more straightforward, but might not be as accurate and useful as using Illustrator. Some of them include online websites like PicMonkey, Inkscape and others. The importance of converting illustrations to digital vectors is rising with increased competition across the world. Drawing on paper and selling paintings is an art form still appreciated and valued in the market. However, they are not much readily paid for these days. Keeping this in mind, we curated this list for transforming illustrations into digital vectors in 9 simple steps. Keep practising and refining your skills. You can start with reviving some of your favourite artworks if they follow all the guideline discussed for effective transformation into a digital vector.
