
Collages have been a savior almost every time you’ve wished to speak in a pictorial language. Be it for some birthday collage idea, a wedding picture collage, or even your office presentations. Photo collages are the most natural, most expressive forms of visual communication and wait till you hear the best part! They inevitably come in an infinite number of layouts and designs.
While many applications are now available online and on phone devices, the most traditional photo editing app remains Photoshop. It gives you the freedom to create stunning layouts without any limits, but it also provides picture editing liberty that most apps do not allow. You can produce beautiful creative collages by taking various elements from different pictures and arranging them to form one big image – much like the newspaper collages we made in childhood.
Magazines and newspapers are an excellent inspiration for photo collage layouts as the entire gridwork is based on a big fat mixture of text and images. You can always refer to these forms of publication designs to decide the look and feel of your photo collage.
In this article, we will encapture a detailed process that surrounds the creation of a basic, yet compelling collage along with text and photo effects. We will also run through a few examples of different kinds of collages that you can make on Photoshop. If you wish to create a photo collage in Photoshop, then these few points need to be kept in mind –
- Make sure that all your images have a similar color story. That way, your collage will look more in sync and thoroughly planned out.
- Select the size of your canvas, keeping in mind the number of images you wish to incorporate. Too many photos in a small area might cramp up the feel of your photo collage.
- Do not overly edit your pictures. It can again spoil the look and feel.
- Negative (white) space in the collage is super important as it differentiates images from each other. Most of your layouts will depend on how you incorporate this white space and also give you the area to experiment with this aspect.
- Make sure you go the right kind of crazy while deciding your layouts. Otherwise, your collage can also end up looking tacky.
Keeping in mind these few pointers to nail a compelling photo collage, let us now move forth towards creating one.
Step 1: Selection of Images

Always remember that the primary purpose of a photo collage is to tell a story. An effective way of conveying a visual novel is to limit your images to a maximum of 6-7 and make sure you include some close-ups, wide-angle shots, and some vibe images. The combination of different types of images provides the viewer with a more definite sense of the theme. However, too many photos could spoil the feel also.
You must make sure that the images have a similar color story – in a sense, they have at least one standard color. This technique ensures that your account looks visually strung together. For this article, we shall follow the images from Muang Mai Market in Chiang Mai, Thailand.
Step 2: Resizing the Images
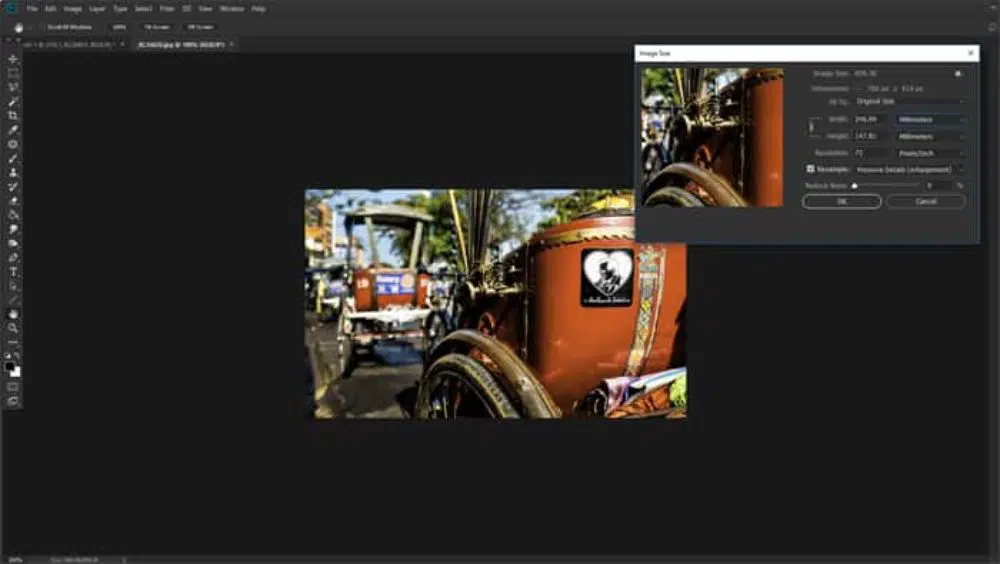
Once you have opened the app on your desktop, open your selected images in Photoshop. This will depend on the purpose of your collage. In case you are creating a layout for print media, you can set the resolution to 300 ppi, and for digital media related uses, you can keep it to 72 ppi.
Decide the size you want to print your collage in and set the canvas size accordingly. Set the images to be 30% larger. This also ensures that you can, later on, resize your images according to the layout. Here, the images are sized to about 700 pixels on the side, which is approximately 247mm at 72 ppi.
Step 3: Open a New Photoshop File
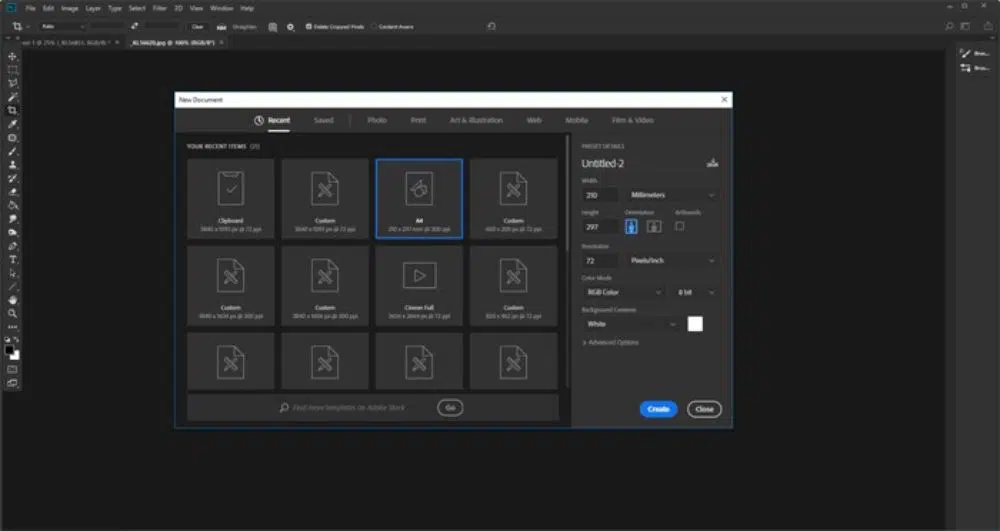
Open a new file in Photoshop. Make sure your canvas size is either A4 or A3, depending on your artwork’s purpose and scope. One thing I will have to keep in mind is to make sure that image and canvas resolution is the same. That is 72ppi. With this resolution, your artwork will be suitable for any digital media – such as a website, a blog, social media posts, or even simple Pinterest boards.
Once you have created the file, make sure you zoom in or out and set the canvas suitable to your desktop view.
Step 4: Add your photos
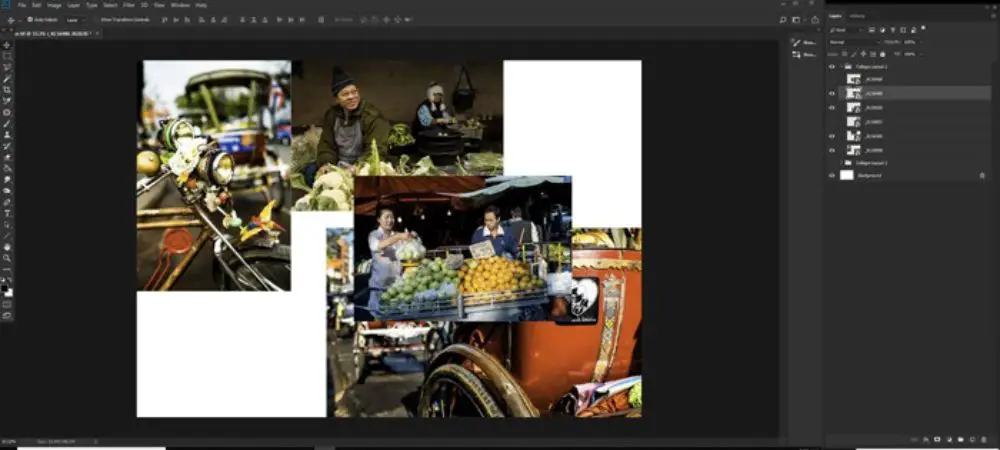 Once you’ve created your canvas and successfully opened your images, you must start adding images to the canvas. While there are few ways to go about this, the best one is to drag and drop the photos from the folder. This way, they are added to your file as Photoshop Smart Objects.
This has its advantages. Resizing a smart object is non-destructive. Hence, you can resize, edit, transform, skew, wrap the sharp object non-destructively. Essentially, this also means that you can distort, change, or resize your smart objects according to the collage without losing any quality.
In case you wish to make any pixel-oriented changes – such as burn, brush tool, color bucket, or any other manipulation, you will have to Rasterize the smart object first. To do this, you can simply right-click on the layer and select the Rasterize layer option.
It is advisable to edit all your images before importing them into the file. However, if you wish to make any further changes, you can always edit them as smart objects. To reduce confusion, you can also hide the image layers which still need placement. This will give you a clearer idea of the space and layout, and you can unhide the layers one by one after placing the images correctly.
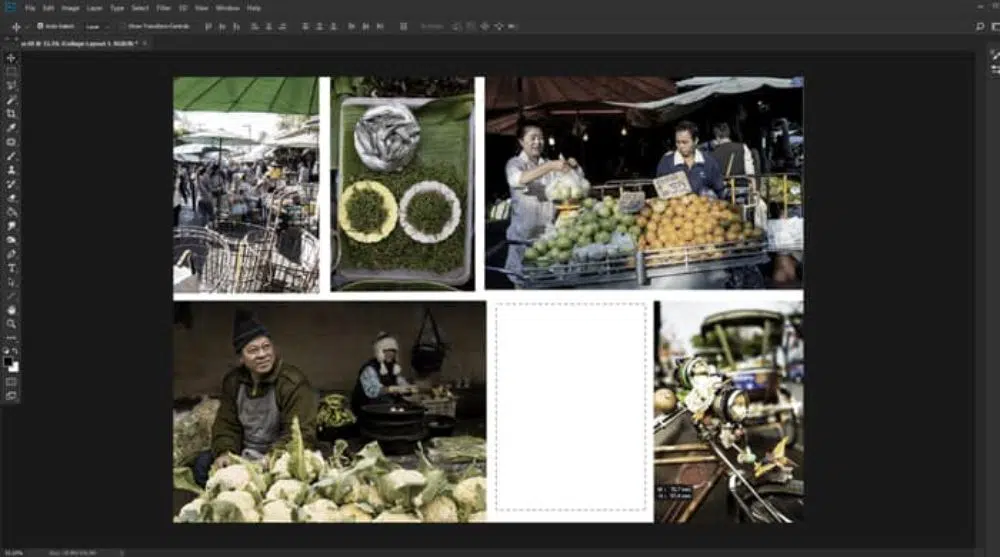
Step 5: Positioning the images
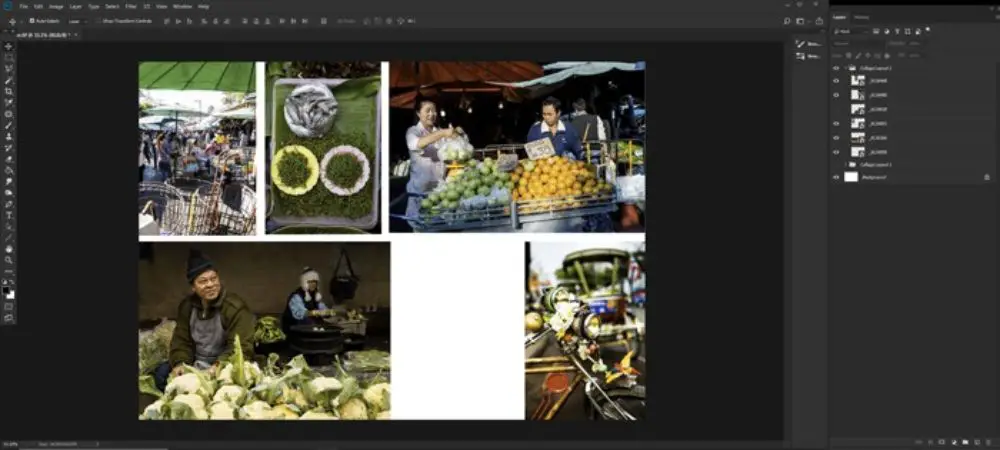
This is where your skill comes into play. Using the Move tool, you can drag the images to their desired positions. You can arrange the photos however you want – stack them up, overlap them or keep them different. What matters the most is the placement that conveys your story most creatively.
In case you wish to bring an image on top from the bottom, you can simply drag the layer and stack in on the top in the Layers Panel.
To try out new and exciting layouts with the same set of images, you can create a Group of Items. To do this, simply click on the folder icon at the bottom of the Layers Panel and add all images to this group. Now duplicate this group and hide the ones that you wish to work on later. You can try a new layout with each group and, eventually, settle on the one that looks best. You can simply use the Lasso Tool or the Quick Selection Tool to crop and delete some parts of the image that you wish to eliminate.
Step 6: Final touches to the photos
Sometimes, if all your images have different colors, you might want to edit them to be part of one story. Since we have our pictures set to Smart Objects, this eases out our work considerably. You can simply double-click on your layer’s thumbnail, and the image will open in a new window. You can make changes to this image however you wish to. To save the changes, simply go to File>Save or Ctrl+S. This will keep the changes in the image as well as your collage file.
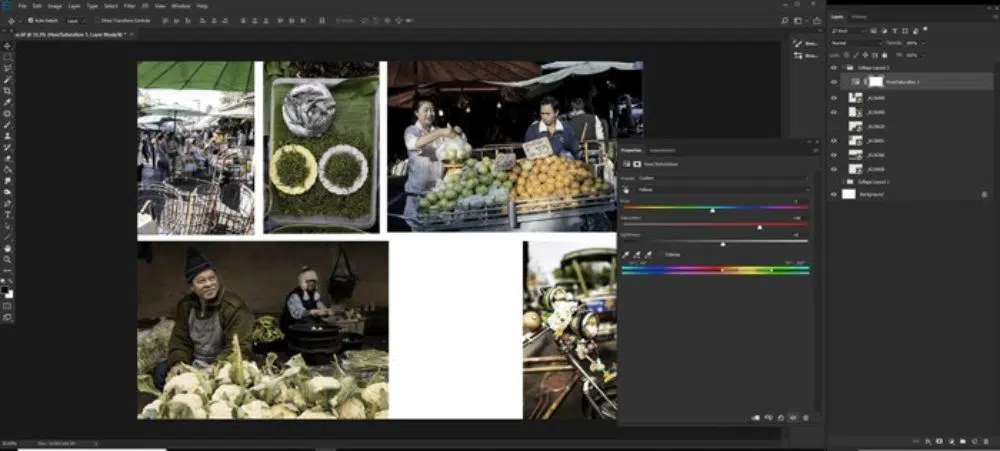
To edit the images, you can click on Edit>Adjustments and visually alter the brightness/contrast, shadows/highlights, and the colors to match your visual story.
If you wish to apply the same changes to all the pictures, you can create an adjustment layer. Click on the New Fill and Adjustment Layer at the bottom of the Layers Panel. You can change the entire look and feel of your collage by changing the color balance altogether. Plus, this is where you can experiment with your editing skills to the fullest. Here, there are two kinds of edits of the same collage. You can try editing it with your creative ideas.
Step 7: Add Text
This is an optional step. Sometimes, you need text to support your collage. In this case, you can use the Text tool from the tools panel, choose a suitable font and size, and begin typing wherever you wish to see the text. However, a collage can also stand alone on its own with the help of the images.
Step 8: Background Layer
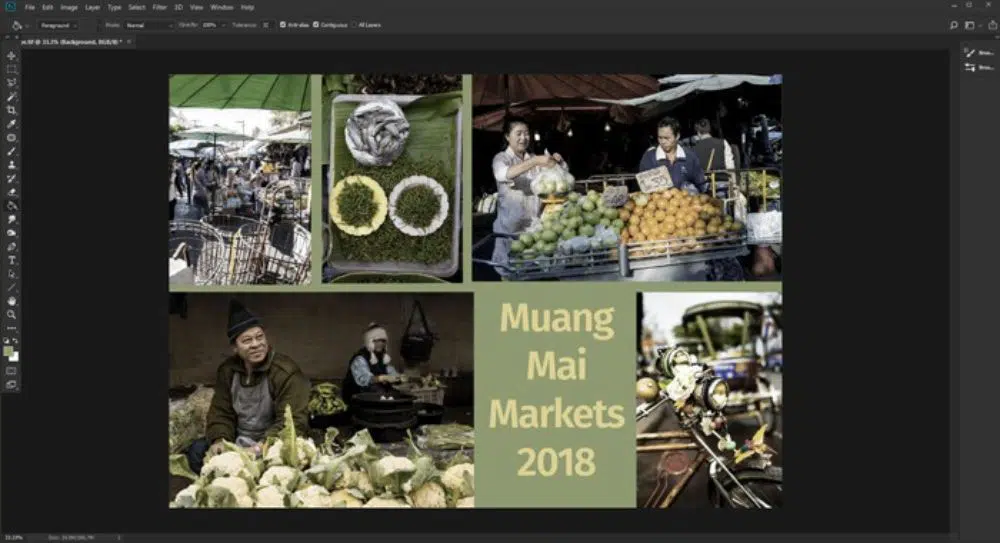
Much like step 7, this part is optional too. Most of the time, white ends up being the perfect background layer. However, if something else suits your collage better, you can easily alter the background according to your needs. Often, colors enhance the look and feel of the entire artwork. You can simply click on the background layer, and using a gradient tool or a paint bucket tool, fill out the layer. Just remember that the background color must add to the artwork, and not make it look tacky or overpowering.
In case you wish to select a color from your collage’s images, you can do so too. Simply use the Color Picker tool. You can also simply add a white border to your pictures, or keep the background simple and white.
Step 9: Add Borders
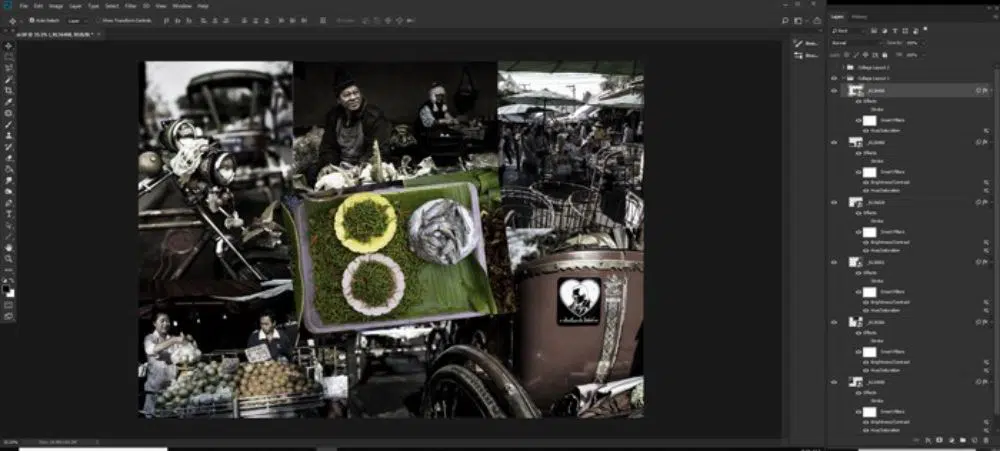
Borders add a whole lot of character to the frame. You can add Polaroid borders to your images, or old school film effects to make them look vintage. You can simply stick to white/black borders, too, which can distinguish your images from each other.
To do so, select one of your images. Click on the ‘fx’ icon at the bottom of the Layers Panel and click on Stroke. In the Layer Style window, adjust the size, position, opacity, and color.
You can simply copy and paste the layer style, and the stroke will quickly be copied to all other layers as well. This is how you can easily create beautiful photo collages in Photoshop. We have also curated some stunning and creative collages which can easily be replicated on Photoshop. You can find your type and begin right away!
1. Creative Collage:
This particular collage-style mainly depicts an energetic mood. It comprises of various images manipulated and cropped to create a strong visual. The easiest way to achieve this kind of cuts is via the Quick Selection tool.
2. Photo Manipulation:
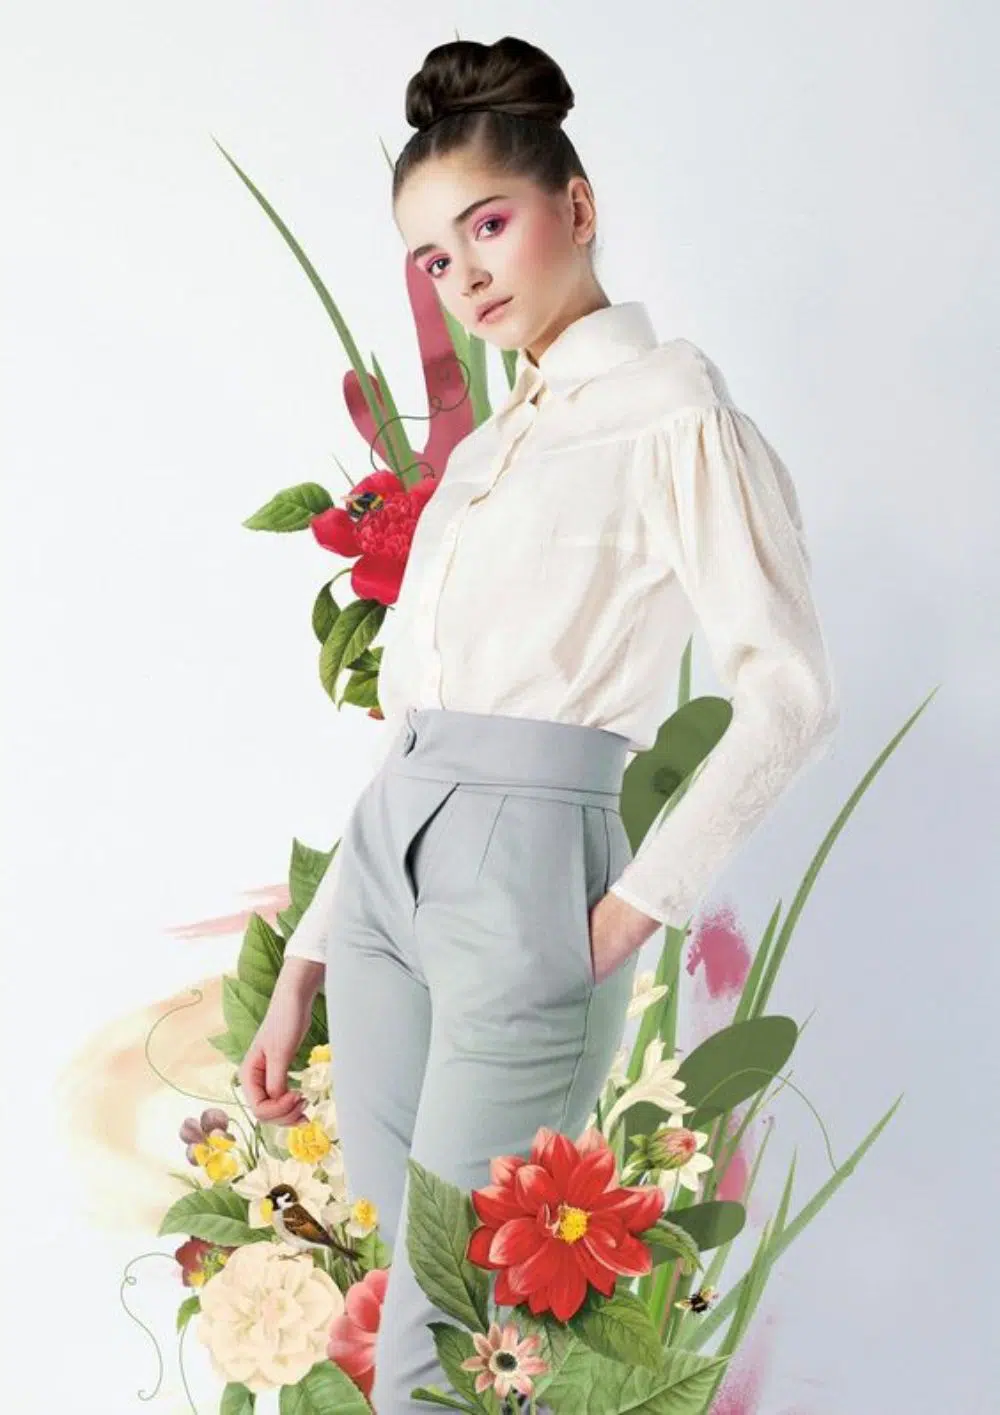
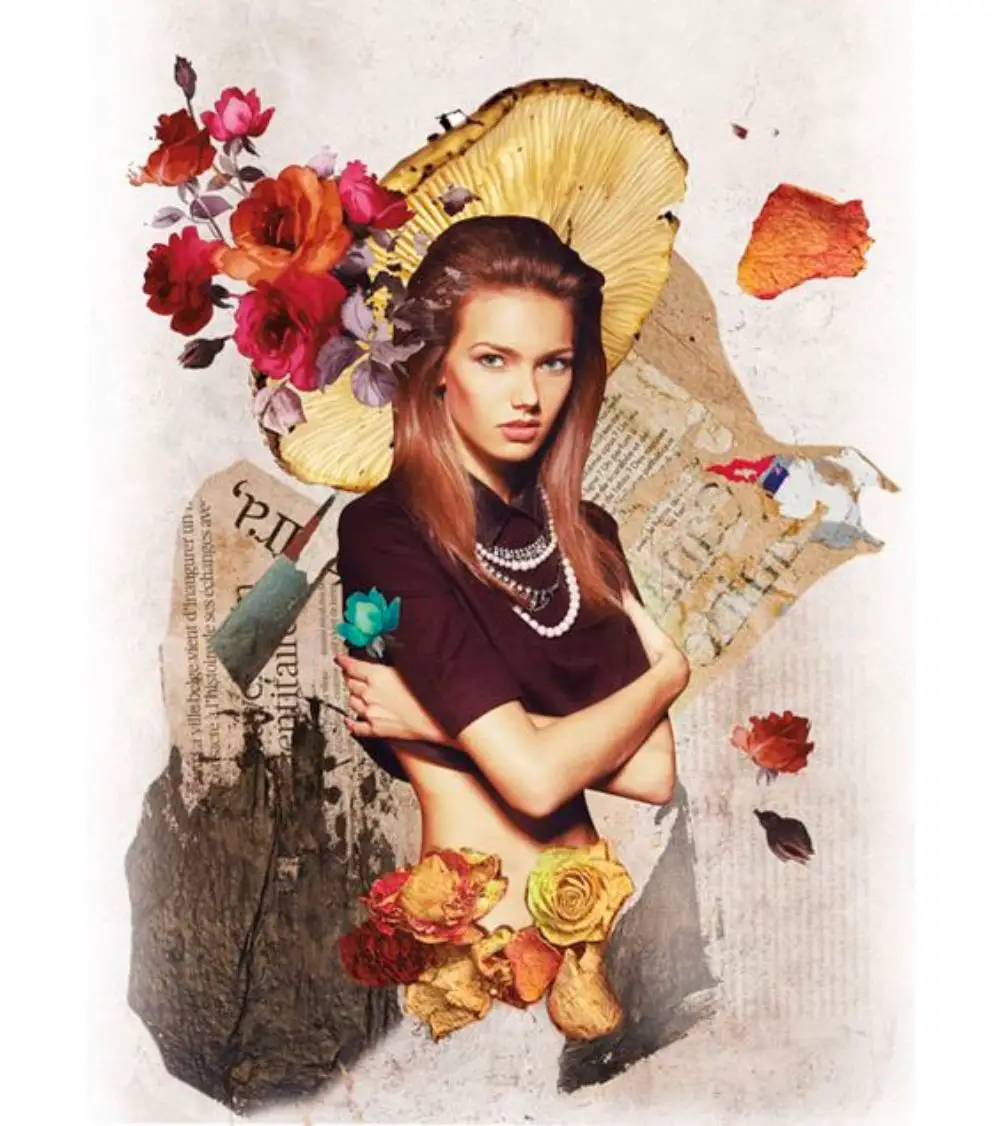
While this is a fast-growing trend on all social media platforms, these kinds of photo manipulations can also be collages. Simply made by placing one image behind the girl and on ahead of her, and erasing off the unwanted parts gives you this result. A lot of creative collages can be laid out using this technique.
3. Pop Art Collages:

Another super-famous kind of collage is these pop art ones. Inspired by pop elements and trends, these look super cool and are very easy to achieve. You can browse through various projects that could give you a millennial feel.
4. Dystopian Art:

Surrealist collages are quite captivating. While it is a whole new genre of art altogether, it is very intriguing to create and showcase. Slightly more challenging to achieve, this work is highly imaginative and mostly requires excellent skills in Photoshop.
5. Face Collage:

Using various elements, faces and figures can be made in collages. This is as good as illustrations as it takes a lot of experience and a good idea of light and shadow. In case you wish to achieve this effect for your collage, make sure you have a lot of images handy that could be used to create the required results.
These were a few examples of new and creative collage ideas that could be used as inspiration for your art. In case you have any issues with creating these effects, you can look up for insights on YouTube or browse through the various available applications on PlayStore and App Store.

Hi,
The place… option in Adobe Photoshop 7.0 shows only *.Al,*.EPS,*.PDF,*.PDP files to be added. It is not accepting *.jpeg,*.jpg. What to do?
hey Amibath, i have faced that problem too. but I convert my jpg files into pdf files online and successfully i have just finish this tutorial. Try this, it will help.